
You’ve mostly seen it in several Pinterest or online recipes, “Brown Butter Chocolate Chip Cookies” or “Brown Butter Pancakes.”
Browned butter is as self-explanitory as it seems. By heating your butter you can reveal hidden flavors to elevate your recipes, leaving your family begging for the secret ingredient
If you’ve ever wondered if it’s worth the extra effort, try this 15 minute step by step guide out and you’ll see what all the buzz is about .
We will discuss…
- How to make browned butter with photos and simple but detailed steps
- Tips to success with every batch

How to: Browning Bakes Better Butter
Time spent: 15 minutes
Equipment used:
- Small saucepan
- Spatula or spoon
- Heat-safe bowl
- Clock (to monitor time)
Step 1: Heat
Heat your small saucepan on your stovetop to medium heat and add your butter to the pan
If your butter is still cold from the fridge, cut it into small chunks for even melting. If your butter is already room temp, simply add it to the heat
As your butter melts it should look like this (below), the solid white parts are normal. Those are the milk solids in the butter

If you’re keeping an eye on the clock, this should take about 1 to 2 minutes to melt fully
Step 2: Stir slowly
Using a spoon or spatula, stir your butter slowly. This prevents the milk solids from settling at the bottom and burning
After melting fully, the butter will start to bubble. This means you’re doing good so far! Keep an eye on your butter and keep stirring


Be wary of the hot butter splattering, similar to the oil that bounces off cooking bacon. It will sting if you aren’t careful around it
This bubbling is at about the 4 or 5-minute mark and will begin to turn frothy soon.
Step 3: Do you smell that?
It’s a misconception that you should use your eyes to determine if your butter is adequately browned; for this, you’ll want to keep your nose peeled instead of your eyes
In the image below, you’ll notice the butter appears frothy and a thick white layer makes any browned milk solids seem invisible

Fortunately, browned butter releases a delicious scent resembling toffee or caramel. Often the butter is also a darker, caramel color but may be hidden by frothy bubbles
If smell isn’t your strongest sense, you may want to get closer to the butter to take a sniff. Careful not to position directly over your pan, put yourself in the hot-butter splatter zone
I sometimes like to use my spatula to move some froth aside to see the browned butter underneath as well, just to be extra sure
If you’re still checking the time, this is about 6 minutes into your browning
Step 4: Is it hot in here or is that just you?
Once you smell that sweet toffee smell and/or see those soft brown milk solids it is time to remove from heat
Removing the butter from heat is key to maintaining your perfect browned butter, left on heat too long and it will start to burn
Having a heat-safe bowl or Tupperware nearby is my go-to, it allows me to get my butter off heat and gives me time to clean up while my butter cools

This is about the 10-minute mark, your butter is browned and you are ready to bake your next masterpiece!
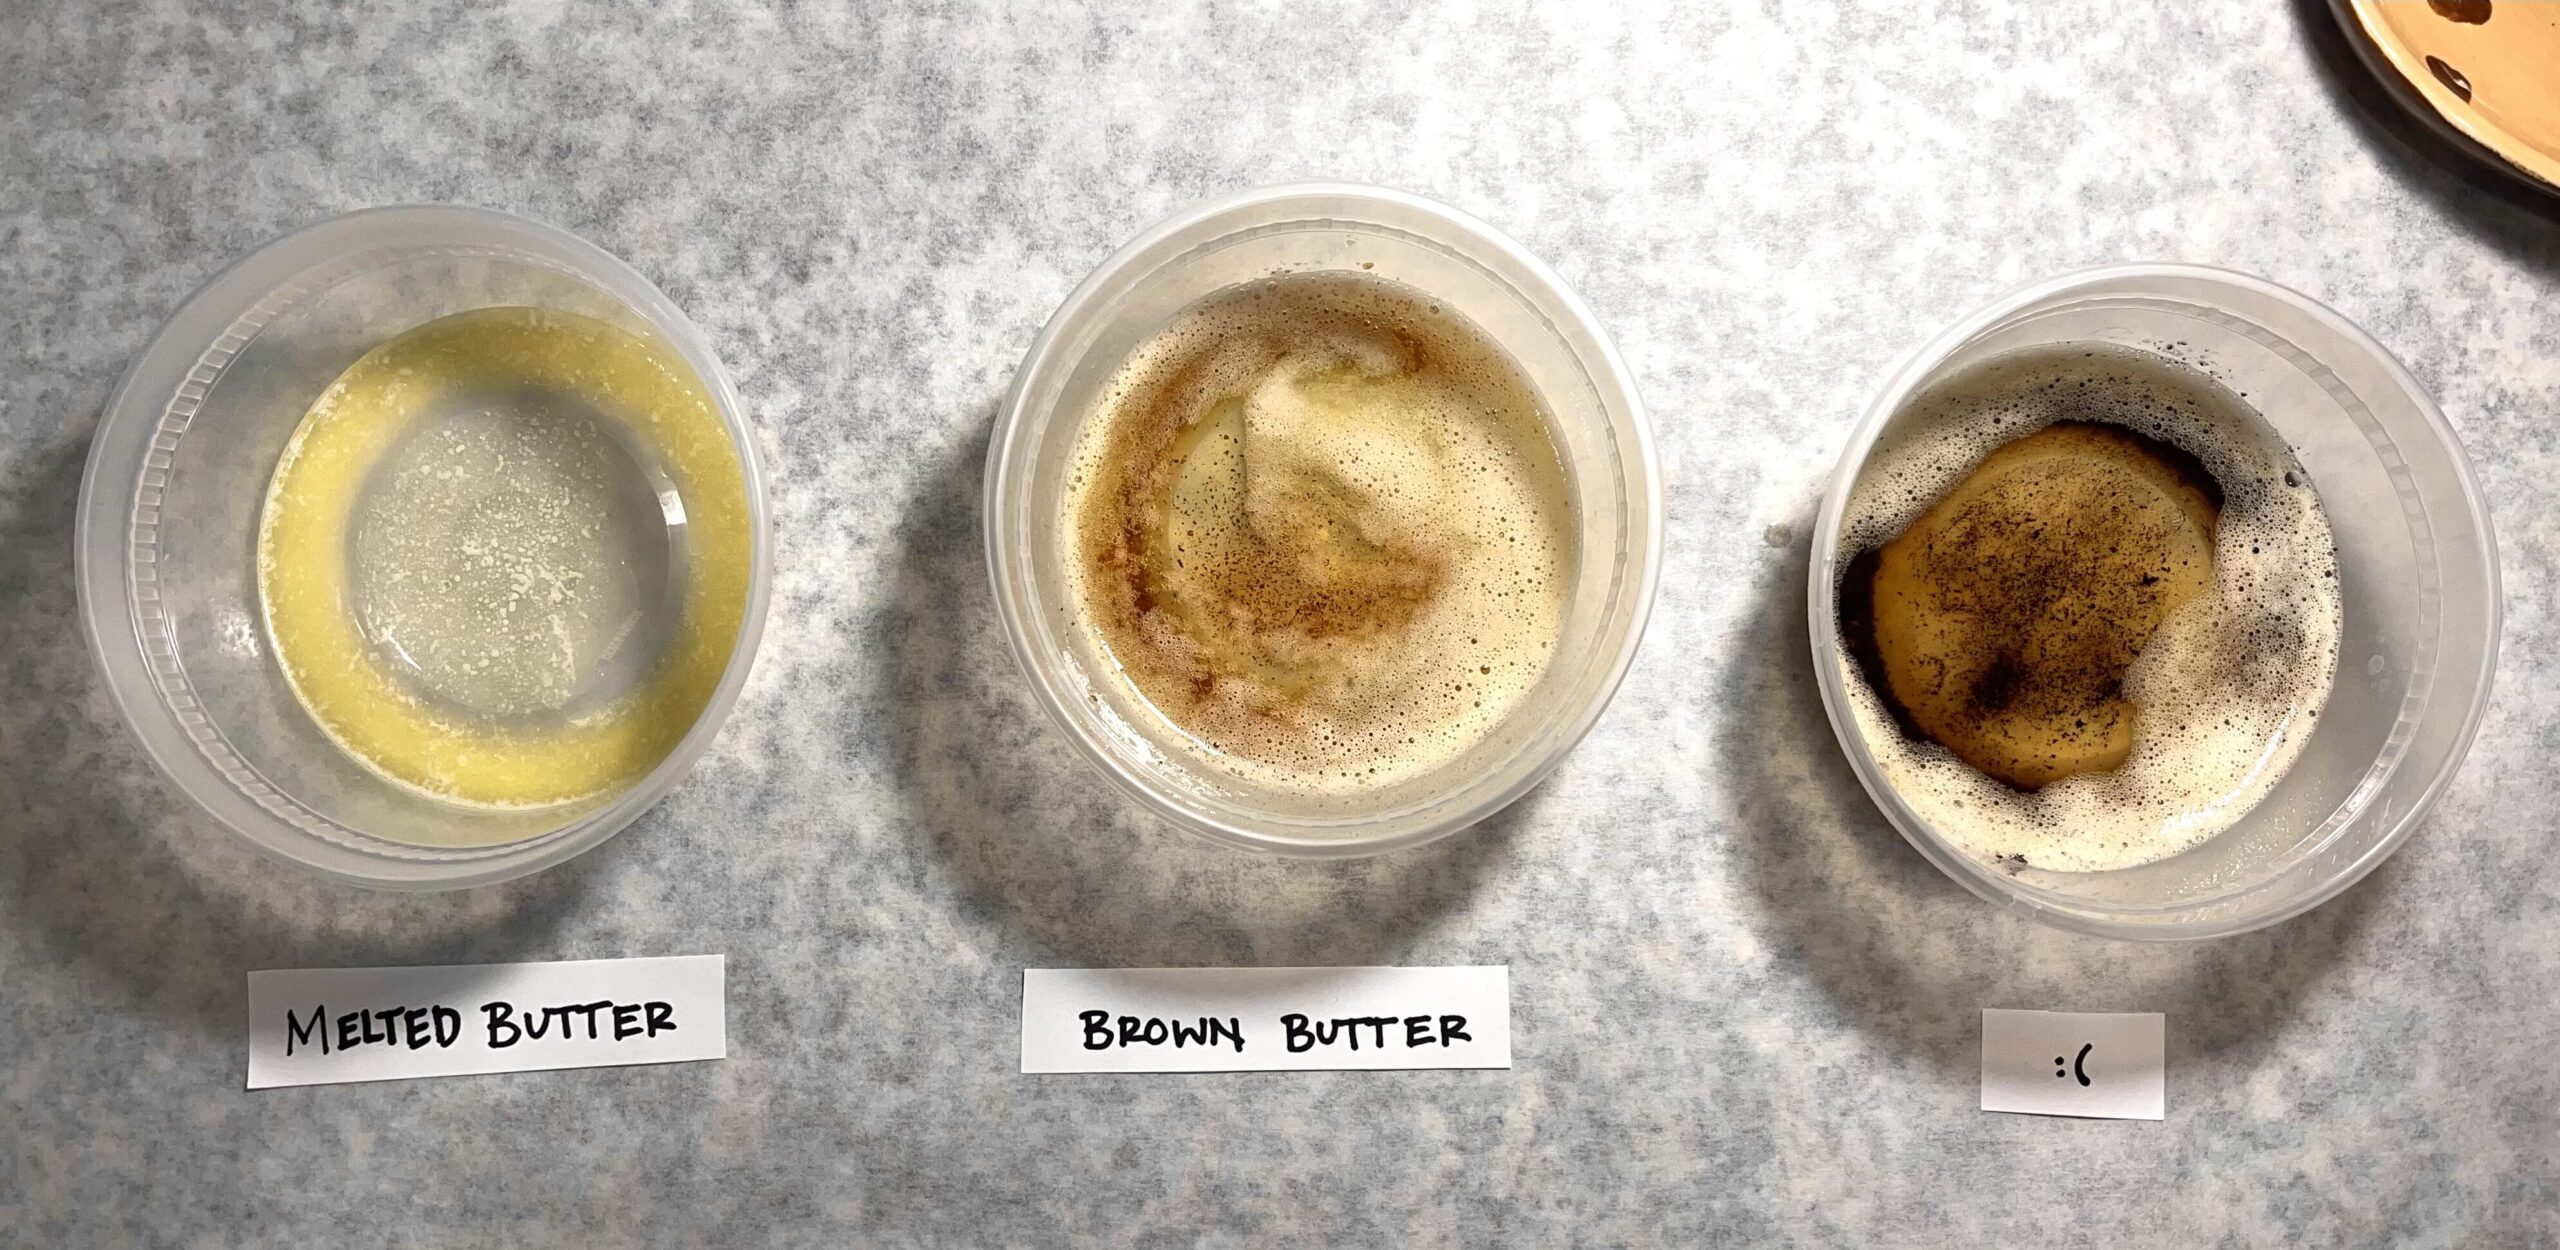
The Final Product
Your final product should look something like the middle bowl of browned butter, with just melted butter on the left and over-browned butter on the right

Notice the difference in color between the three; especially the 2nd and third bowls. The darker your browned butter becomes, the more you risk a burnt flavor rather than a toffee flavor
If your butter looks like the 🙁 , do not fret! Practice makes perfect, and for many (myself included) making perfectly browned butter takes practice. Keep at it, you got this!
Tips to success
The recipe I’m using doesn’t call for melted butter…
No biggie, most baking recipes don’t! Leave your freshly browned butter to cool to room temp on the counter once done
Once it is back to room temp, pop it in the fridge for a few hours and you’ll have wonderful, solid butter!
I want to replace regular butter with browned butter in my next recipe…
Highly recommend, a great idea! It’s especially yummy in desserts with chocolate, coffee, or caramel
Keep in mind, when you brown butter a portion of the butter’s mass (water) evaporates leaving a smaller volume. So, if you brown 1 cup of butter you may only end up with 3/4 of a cup of butter
If you’re particular, you can weigh your butter before and after browning to know how much moisture (water) to reintroduce to your recipe
- 1 stick of butter = about 115 grams (varies slightly)
- 1 tablespoon of butter = about 14 grams
If you are okay with an estimate, add 2 tablespoons of water per 1/2 cup of browned butter.
In the past, I have also compensated ahead of time by adding 1/4 cup over the recipe recommendation for regular butter to maintain the ideal amount of butter for the recipe
Does it matter if my butter is salted? Unsalted?
Not at all, the salt content or lack thereof will not change the way your butter melts, browns, or solidifies
If you use salted butter you may want to consider decreasing the salt you add to your baking recipe, but I leave this up to the baker’s discretion
Can I make this ahead of time?
Thinking ahead, I love it! Of course you can!
Browned butter (once cooled) can be left in the fridge for up to a week or in the freezer for 3 months. Be sure to write the date you made it on the lid
What’s the best way to store it?
I prefer Tupperware, it’s easy to clean the slimy residue and even easier to remove from the container
Some bakers love using jars, they are crazy cute and fit a cozy aesthetic. I’ve tried it and found it more trouble than it was worth to clean butter out of the skinny-necked jar
I hope this how-to guide helped, let me know if you have any questions or comments down below!
One response to “How to Make Bussin’ Brown Butter”
[…] your butter (a butter browning guide can be found here) and let cool until […]